
Oracle Ddatabase の性能を見たい時は、StatspackやAWRレポートを使用している方は多いと思います。
ただしこれらのツールはグラフィカルに見れません。そんな時、ブラウザから性能をグラフィカルに見れるOracle Enterprise Manager は非常に便利です。
インストールするのに手間はかかりますが、性能参照以外にも、DBに対する各操作も出来ますので、インストール後の便利さは格段に違ってきます。
今回はこの Oracle Enterprise Manager 13c (OEM13c)のインストール方法について紹介します。
ちなみに私は、11g,12c,18c のDBを Oracle Enterprise Manager 13c で管理しています。
使用するOSバージョンと Oracle Enterprise Manager バージョン
OS: Oracle Linux Server release 7.7
OEM: Oracle Enterprise Manager Cloud Control 13c Release 3 (13.3.0.0) for Linux x86-64
OEMインストールに必要なメディアのダウンロード
OEMインストールファイルをダウンロード
まずは以下のダウンロードサイトにアクセスします。

以下のファイルを全てダウンロードします。
- em13300_linux64.bin
- em13300_linux64-2.zip
- em13300_linux64-3.zip
- em13300_linux64-4.zip
- em13300_linux64-5.zip
- em13300_linux64-6.zip
Oracle Database 18cのインストールファイルをダウンロード
Enterprise Managerは内部で保有するデータをOracle Databeseに保存しています。
そのため、まずはDBのインストールが必要になるので、DBのインストールメディアをダウンロードします。
リポジトリDB用として使用できる最新のDBは「Oracle Database 18c」なので、まずはこちらをインストールして使用します。
以下のダウンロードサイトにアクセスします。

「Oracle Database 18c (18.3)」 → 「Linux x86-64」 → 「See All」をクリック
以下のファイルをダウンロードします。
- LINUX.X64_180000_db_home.zip
Databaseテンプレートファイルのダウンロード
OEM13c用のリポジトリデータベースを作成するためのテンプレートが用意させているので、以下からダウンロードします。

以下のDB18c用のファイルをダウンロードします。
- 18.1.0.0.0 DB Template for EM 13.3.0.0 on Linux x86-64
OEM13cインストール前の準備
X11転送に必要なパッケージのインストール
OEM13c及びDB18cをGUIでインストールするため、画面のリモート転送に必要なパッケージをインストールします。
Linuxサーバ側にデスクトップ環境が入っていれば当手順は不要です。
[root@oel77 ~]# yum install -y xorg-x11-xauth
Loaded plugins: langpacks, ulninfo
Resolving Dependencies
--> Running transaction check
---> Package xorg-x11-xauth.x86_64 1:1.0.9-1.el7 will be installed
--> Processing Dependency: libXmuu.so.1()(64bit) for package: 1:xorg-x11-xauth-1.0.9-1.el7.x86_64
--> Processing Dependency: libXext.so.6()(64bit) for package: 1:xorg-x11-xauth-1.0.9-1.el7.x86_64
--> Processing Dependency: libXau.so.6()(64bit) for package: 1:xorg-x11-xauth-1.0.9-1.el7.x86_64
--> Processing Dependency: libX11.so.6()(64bit) for package: 1:xorg-x11-xauth-1.0.9-1.el7.x86_64
--> Running transaction check
---> Package libX11.x86_64 0:1.6.7-2.el7 will be installed
--> Processing Dependency: libX11-common >= 1.6.7-2.el7 for package: libX11-1.6.7-2.el7.x86_64
--> Processing Dependency: libxcb.so.1()(64bit) for package: libX11-1.6.7-2.el7.x86_64
---> Package libXau.x86_64 0:1.0.8-2.1.el7 will be installed
---> Package libXext.x86_64 0:1.3.3-3.el7 will be installed
---> Package libXmu.x86_64 0:1.1.2-2.el7 will be installed
--> Processing Dependency: libXt.so.6()(64bit) for package: libXmu-1.1.2-2.el7.x86_64
--> Running transaction check
---> Package libX11-common.noarch 0:1.6.7-2.el7 will be installed
---> Package libXt.x86_64 0:1.1.5-3.el7 will be installed
--> Processing Dependency: libSM.so.6()(64bit) for package: libXt-1.1.5-3.el7.x86_64
--> Processing Dependency: libICE.so.6()(64bit) for package: libXt-1.1.5-3.el7.x86_64
---> Package libxcb.x86_64 0:1.13-1.el7 will be installed
--> Running transaction check
---> Package libICE.x86_64 0:1.0.9-9.el7 will be installed
---> Package libSM.x86_64 0:1.2.2-2.el7 will be installed
--> Finished Dependency Resolution

Dependencies Resolved

========================================================================================================================
 Package                         Arch                    Version                           Repository              Size
========================================================================================================================
Installing:
 xorg-x11-xauth                  x86_64                  1:1.0.9-1.el7                     OEL77                   29 k
Installing for dependencies:
 libICE                          x86_64                  1.0.9-9.el7                       OEL77                   66 k
 libSM                           x86_64                  1.2.2-2.el7                       OEL77                   39 k
 libX11                          x86_64                  1.6.7-2.el7                       OEL77                  606 k
 libX11-common                   noarch                  1.6.7-2.el7                       OEL77                  164 k
 libXau                          x86_64                  1.0.8-2.1.el7                     OEL77                   28 k
 libXext                         x86_64                  1.3.3-3.el7                       OEL77                   38 k
 libXmu                          x86_64                  1.1.2-2.el7                       OEL77                   70 k
 libXt                           x86_64                  1.1.5-3.el7                       OEL77                  172 k
 libxcb                          x86_64                  1.13-1.el7                        OEL77                  213 k

Transaction Summary
========================================================================================================================
Install  1 Package (+9 Dependent packages)

Total download size: 1.4 M
Installed size: 4.5 M
Downloading packages:
------------------------------------------------------------------------------------------------------------------------
Total                                                                                   8.5 MB/s | 1.4 MB  00:00:00
Running transaction check
Running transaction test
Transaction test succeeded
Running transaction
  Installing : libXau-1.0.8-2.1.el7.x86_64                                                                         1/10
  Installing : libICE-1.0.9-9.el7.x86_64                                                                           2/10
  Installing : libSM-1.2.2-2.el7.x86_64                                                                            3/10
  Installing : libxcb-1.13-1.el7.x86_64                                                                            4/10
  Installing : libX11-common-1.6.7-2.el7.noarch                                                                    5/10
  Installing : libX11-1.6.7-2.el7.x86_64                                                                           6/10
  Installing : libXext-1.3.3-3.el7.x86_64                                                                          7/10
  Installing : libXt-1.1.5-3.el7.x86_64                                                                            8/10
  Installing : libXmu-1.1.2-2.el7.x86_64                                                                           9/10
  Installing : 1:xorg-x11-xauth-1.0.9-1.el7.x86_64                                                                10/10
  Verifying  : libXext-1.3.3-3.el7.x86_64                                                                          1/10
  Verifying  : libICE-1.0.9-9.el7.x86_64                                                                           2/10
  Verifying  : libXau-1.0.8-2.1.el7.x86_64                                                                         3/10
  Verifying  : libSM-1.2.2-2.el7.x86_64                                                                            4/10
  Verifying  : libXmu-1.1.2-2.el7.x86_64                                                                           5/10
  Verifying  : libX11-1.6.7-2.el7.x86_64                                                                           6/10
  Verifying  : libX11-common-1.6.7-2.el7.noarch                                                                    7/10
  Verifying  : libxcb-1.13-1.el7.x86_64                                                                            8/10
  Verifying  : libXt-1.1.5-3.el7.x86_64                                                                            9/10
  Verifying  : 1:xorg-x11-xauth-1.0.9-1.el7.x86_64                                                                10/10

Installed:
  xorg-x11-xauth.x86_64 1:1.0.9-1.el7

Dependency Installed:
  libICE.x86_64 0:1.0.9-9.el7                libSM.x86_64 0:1.2.2-2.el7            libX11.x86_64 0:1.6.7-2.el7
  libX11-common.noarch 0:1.6.7-2.el7         libXau.x86_64 0:1.0.8-2.1.el7         libXext.x86_64 0:1.3.3-3.el7
  libXmu.x86_64 0:1.1.2-2.el7                libXt.x86_64 0:1.1.5-3.el7            libxcb.x86_64 0:1.13-1.el7

Complete!
GUI画面を自分のPCに転送するためのソフトをインストール
X Windowソフトを自分のPCにインストールし、サーバで起動したGUI画面を自分のPCで表示させます。
私は昔から Xming を使用しています。Windows10でも動作しています。
以下からダウンロード・インストールし、起動しておくだけでサーバ側で起動したインストーラーが自分のPCに転送され表示されます。

SELinuxの無効化
現セッションでSElinuxを無効化します。
[root@oel77 ~]# setenforce 0
OSが再起動しても問題ないように /etc/selinux/config を「SELINUX=disabled」に変更し、設定を永続化します。
[root@oel77 ~]# vi /etc/selinux/config
# This file controls the state of SELinux on the system.
# SELINUX= can take one of these three values:
#     enforcing - SELinux security policy is enforced.
#     permissive - SELinux prints warnings instead of enforcing.
#     disabled - No SELinux policy is loaded.
SELINUX=disabled
# SELINUXTYPE= can take one of three values:
#     targeted - Targeted processes are protected,
#     minimum - Modification of targeted policy. Only selected processes are protected.
#     mls - Multi Level Security protection.
SELINUXTYPE=targeted
OEMリポジトリ用のDB(18c)インストール
自サーバ名を/etc/hostsに登録
ホスト名解決ができるように、自ホスト名と自IPを /etc/hosts に追加します。
[root@oel77 ~]# vi /etc/hosts
oel77   192.168.30.101 ←追加
pingが通るか確認します。
[root@oel77 ~]# ping oel77
PING oel77 (192.168.30.101) 56(84) bytes of data.
64 bytes from oel77 (192.168.30.101): icmp_seq=1 ttl=64 time=0.196 ms
64 bytes from oel77 (192.168.30.101): icmp_seq=2 ttl=64 time=0.034 ms
64 bytes from oel77 (192.168.30.101): icmp_seq=3 ttl=64 time=0.034 ms
^C
--- oel77 ping statistics ---
3 packets transmitted, 3 received, 0% packet loss, time 2062ms
rtt min/avg/max/mdev = 0.034/0.088/0.196/0.076 ms
透過的HugePagesの無効化確認
[root@oel77 ~]# cat /sys/kernel/mm/transparent_hugepage/enabled
[always] madvise never
neverではない場合、/etc/default/grub に以下赤文字のパラメータ[transparent_hugepage=never]を追加します。
[root@oel77 ~]# vi /etc/default/grub
===
GRUB_TIMEOUT=5
GRUB_DISTRIBUTOR="$(sed 's, release .*$,,g' /etc/system-release)"
GRUB_DEFAULT=saved
GRUB_DISABLE_SUBMENU=true
GRUB_TERMINAL_OUTPUT="console"
GRUB_CMDLINE_LINUX="crashkernel=auto rd.lvm.lv=ol/root rd.lvm.lv=ol/swap rhgb quiet transparent_hugepage=never"
GRUB_DISABLE_RECOVERY="true"
===
追加が完了したらgrub.cfgを再作成します。
[root@oel77 ~]# grub2-mkconfig -o /boot/grub2/grub.cfg
Generating grub configuration file ...
Found linux image: /boot/vmlinuz-4.14.35-1902.3.2.el7uek.x86_64
Found initrd image: /boot/initramfs-4.14.35-1902.3.2.el7uek.x86_64.img
Found linux image: /boot/vmlinuz-3.10.0-1062.el7.x86_64
Found initrd image: /boot/initramfs-3.10.0-1062.el7.x86_64.img
Found linux image: /boot/vmlinuz-0-rescue-2d0aa025178a484386baec4f0198d44e
Found initrd image: /boot/initramfs-0-rescue-2d0aa025178a484386baec4f0198d44e.img
done
grubの設定を反映させるためにOSを再起動します。
[root@oel77 ~]# systemctl reboot
neverになっていることを確認できればOKです。
[root@oel77 ~]# cat /sys/kernel/mm/transparent_hugepage/enabled
always madvise [never]
LinuxディスクI/Oスケジューラの確認
基本的にデフォルトでディスクI/Oスケジューラは[deadline]ですが、各ディスクに対してそれぞれ確認します。
[root@oel77 ~]# cat /sys/block/sda/queue/scheduler
noop [deadline] cfq
必要パッケージのインストール
Oracle Database18cに必要なパッケージ郡をインストールします。
以下は1パッケージずつインストールしていますが、「yum install -y bc.x86_64 binutils.x86_64 ・・・」と並べて一括インストールすることも出来ます。
[root@oel77 ~]# yum install -y bc.x86_64
[root@oel77 ~]# yum install -y binutils.x86_64
[root@oel77 ~]# yum install -y compat-libcap1.x86_64
[root@oel77 ~]# yum install -y compat-libstdc++-33.i686
[root@oel77 ~]# yum install -y compat-libstdc++-33.x86_64
[root@oel77 ~]# yum install -y elfutils-libelf.i686
[root@oel77 ~]# yum install -y elfutils-libelf.x86_64
[root@oel77 ~]# yum install -y elfutils-libelf-devel.i686
[root@oel77 ~]# yum install -y elfutils-libelf-devel.x86_64
[root@oel77 ~]# yum install -y fontconfig-devel.x86_64
[root@oel77 ~]# yum install -y glibc.i686
[root@oel77 ~]# yum install -y glibc.x86_64
[root@oel77 ~]# yum install -y glibc-devel.i686
[root@oel77 ~]# yum install -y glibc-devel.x86_64
[root@oel77 ~]# yum install -y ksh
[root@oel77 ~]# yum install -y libaio.i686
[root@oel77 ~]# yum install -y libaio.x86_64
[root@oel77 ~]# yum install -y libaio-devel.i686
[root@oel77 ~]# yum install -y libaio-devel.x86_64
[root@oel77 ~]# yum install -y libX11.i686
[root@oel77 ~]# yum install -y libX11.x86_64
[root@oel77 ~]# yum install -y libXau.i686
[root@oel77 ~]# yum install -y libXau.x86_64
[root@oel77 ~]# yum install -y libXi.i686
[root@oel77 ~]# yum install -y libXi.x86_64
[root@oel77 ~]# yum install -y libXtst.i686
[root@oel77 ~]# yum install -y libXtst.x86_64
[root@oel77 ~]# yum install -y libXrender-devel.i686
[root@oel77 ~]# yum install -y libXrender-devel.x86_64
[root@oel77 ~]# yum install -y libXrender.i686
[root@oel77 ~]# yum install -y libXrender.x86_64
[root@oel77 ~]# yum install -y gcc.x86_64
[root@oel77 ~]# yum install -y libgcc.i686
[root@oel77 ~]# yum install -y libgcc.x86_64
[root@oel77 ~]# yum install -y librdmacm.i686
[root@oel77 ~]# yum install -y librdmacm.x86_64
[root@oel77 ~]# yum install -y libstdc++.i686
[root@oel77 ~]# yum install -y libstdc++.x86_64
[root@oel77 ~]# yum install -y libstdc++-devel.i686
[root@oel77 ~]# yum install -y libstdc++-devel.x86_64
[root@oel77 ~]# yum install -y libxcb.i686
[root@oel77 ~]# yum install -y libxcb.x86_64
[root@oel77 ~]# yum install -y make.x86_64
[root@oel77 ~]# yum install -y nfs-utils.x86_64
[root@oel77 ~]# yum install -y net-tools.x86_64
[root@oel77 ~]# yum install -y python.x86_64
[root@oel77 ~]# yum install -y python-configshell.noarch
[root@oel77 ~]# yum install -y python-rtslib.noarch
[root@oel77 ~]# yum install -y python-six.noarch
[root@oel77 ~]# yum install -y smartmontools.x86_64
[root@oel77 ~]# yum install -y sysstat.x86_64
[root@oel77 ~]# yum install -y targetcli.noarch
カーネルパラメータの設定
以下のファイルを作成し、Oracle Database インストールに必要なカーネルパラメータを記述します。
[root@oel77 ~]# vi /etc/sysctl.d/97-oracle-database-sysctl.conf
fs.aio-max-nr                = 1048576
fs.file-max                  = 6815744
kernel.shmall                = 2097152
kernel.shmmax                = 4294967295
kernel.shmmni                = 4096
kernel.sem                   = 250 32000 100 128
net.ipv4.ip_local_port_range = 9000 65500
net.core.rmem_default        = 262144
net.core.rmem_max            = 4194304
net.core.wmem_default        = 262144
net.core.wmem_max            = 1048576
カーネルパラメータの設定を反映させます。
[root@oel77 ~]# sysctl --system
OSを再起動します。
[root@oel77 ~]# systemctl reboot
再起動完了後、それぞれのパラメータが変更されているか確認します。
以下は例として1つのパラメータのみ確認しています。
[root@oel77 ~]# sysctl -a | grep aio-max-nr
fs.aio-max-nr = 1048576
OSグループの作成
Oracle Database インストールに必要なグループをそれぞれ作っていきます。
[root@oel77 ~]# groupadd -g 54321 oinstall
[root@oel77 ~]# groupadd -g 54322 dba
[root@oel77 ~]# groupadd -g 54323 oper
[root@oel77 ~]# groupadd -g 54324 backupdba
[root@oel77 ~]# groupadd -g 54325 dgdba
[root@oel77 ~]# groupadd -g 54326 kmdba
OSユーザー(oracle)の作成
Oracle Database をインストールするOSユーザを作成します。
[root@oel77 ~]# useradd -u 54321 -g oinstall -G dba,oper,backupdba,dgdba,kmdba oracle
[root@oel77 ~]# passwd oracle
Changing password for user oracle.
New password: ←設定するパスワードを入力
Retype new password: ←再度設定するパスワードを入力
passwd: all authentication tokens updated successfully.
oracleユーザのumask変更
今作成したoracleユーザの .bash_profile に[umask 022]を追加します。
[root@oel77 ~]# vi /home/oracle/.bash_profile
# .bash_profile

# Get the aliases and functions
if [ -f ~/.bashrc ]; then
        . ~/.bashrc
fi

# User specific environment and startup programs

PATH=$PATH:$HOME/.local/bin:$HOME/bin

export PATH
umask 022
oracleユーザでumaskを確認します。0022となっていればOKです。
[root@oel77 ~]# su - oracle
[oracle@oel77 ~]$ umask
0022
[oracle@oel77 ~]$ exit
oracleユーザのリソース制限
limits.confファイルにoracleユーザのリソース制限(以下の赤字部分)を追加します。
[root@oel77 ~]# vi /etc/security/limits.conf
# /etc/security/limits.conf
#
#This file sets the resource limits for the users logged in via PAM.
#It does not affect resource limits of the system services.
#
#Also note that configuration files in /etc/security/limits.d directory,
#which are read in alphabetical order, override the settings in this
#file in case the domain is the same or more specific.
#That means for example that setting a limit for wildcard domain here
#can be overriden with a wildcard setting in a config file in the
#subdirectory, but a user specific setting here can be overriden only
#with a user specific setting in the subdirectory.
#
#Each line describes a limit for a user in the form:
#
#
#
#Where:
# can be:
#        - a user name
#        - a group name, with @group syntax
#        - the wildcard *, for default entry
#        - the wildcard %, can be also used with %group syntax,
#                 for maxlogin limit
#
# can have the two values:
#        - "soft" for enforcing the soft limits
#        - "hard" for enforcing hard limits
#
# can be one of the following:
#        - core - limits the core file size (KB)
#        - data - max data size (KB)
#        - fsize - maximum filesize (KB)
#        - memlock - max locked-in-memory address space (KB)
#        - nofile - max number of open file descriptors
#        - rss - max resident set size (KB)
#        - stack - max stack size (KB)
#        - cpu - max CPU time (MIN)
#        - nproc - max number of processes
#        - as - address space limit (KB)
#        - maxlogins - max number of logins for this user
#        - maxsyslogins - max number of logins on the system
#        - priority - the priority to run user process with
#        - locks - max number of file locks the user can hold
#        - sigpending - max number of pending signals
#        - msgqueue - max memory used by POSIX message queues (bytes)
#        - nice - max nice priority allowed to raise to values: [-20, 19]
#        - rtprio - max realtime priority
#
#
#

#*               soft    core            0
#*               hard    rss             10000
#@student        hard    nproc           20
#@faculty        soft    nproc           20
#@faculty        hard    nproc           50
#ftp             hard    nproc           0
#@student        -       maxlogins       4
oracle           soft    nofile          1024
oracle           hard    nofile          65536
oracle           soft    nproc           2047
oracle           hard    nproc           16384
oracle           soft    stack           10240
oracle           hard    stack           32768
# End of file
Oracleインベントリディレクトリの作成
[root@oel77 ~]# mkdir -p /u01/app/oracle
[root@oel77 ~]# mkdir -p /u01/app/oraInventory
[root@oel77 ~]# chown -R oracle:oinstall /u01/app/oracle
[root@oel77 ~]# chown -R oracle:oinstall /u01/app/oraInventory
[root@oel77 ~]# chmod -R 775 /u01/app
DBインストールディレクトリの作成
[root@oel77 ~]# su - oracle
[oracle@oel77 tmp]$ mkdir -p /u01/app/oracle/product/18.0.0/dbhome_1
ダウンロードしたDBインストールファイルを配置して解凍
[oracle@oel77 tmp]$ cd /u01/app/oracle/product/18.0.0/dbhome_1
[oracle@oel77 dbhome_1]$ unzip -q /tmp/LINUX.X64_180000_db_home.zip
Oracle Database 18c インストーラーの起動
新規ターミナルを開き、oracleユーザでログインして、runInstallerを起動します。
正常にX転送が出来ればGUIインストーラーがリモート表示されます。
[oracle@oel77 ~]$ cd /u01/app/oracle/product/18.0.0/dbhome_1
[oracle@oel77 ~]$ export LANG=C
[oracle@oel77 ~]$ ./runInstaller
ソフトのみインストールするので、[Set Up Software Only]を選択。

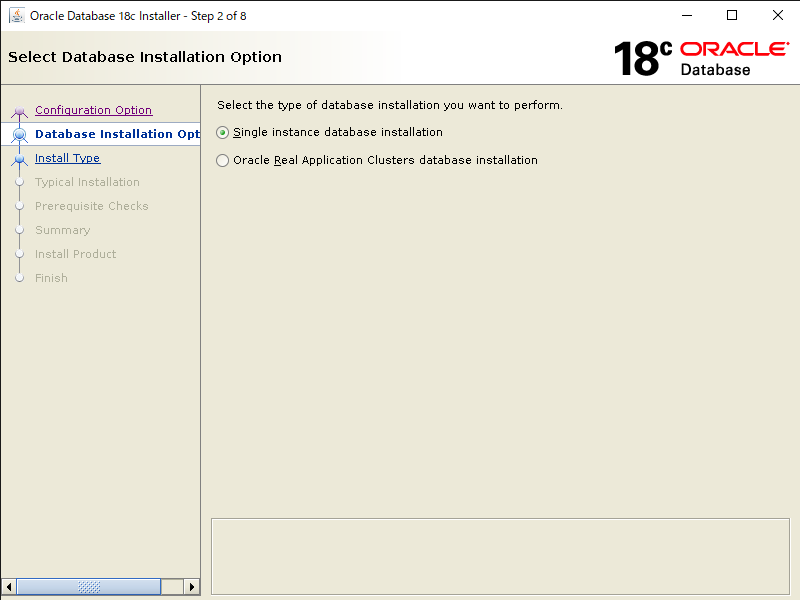
今回はシングル構成でリポジトリDBを作成するので、[Single instance database installation]を選択。
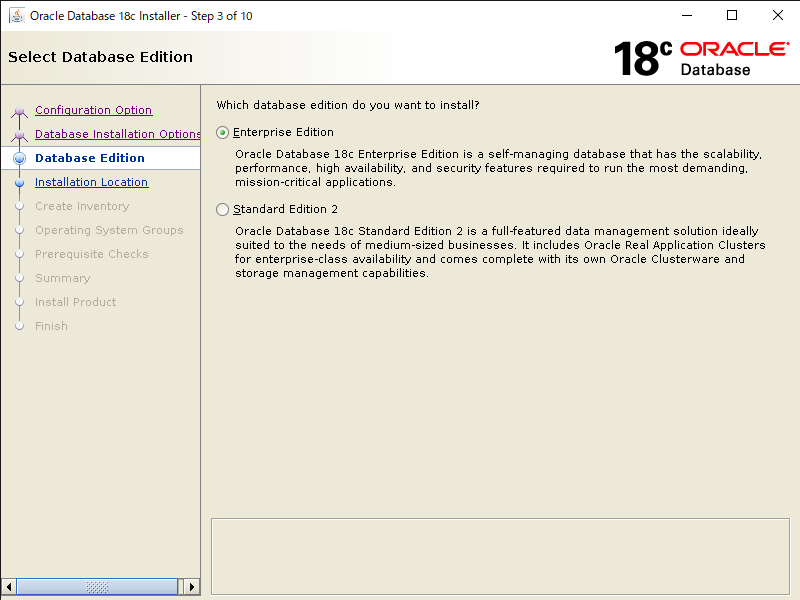
ライセンスは[Enterprise Edition]を選択。
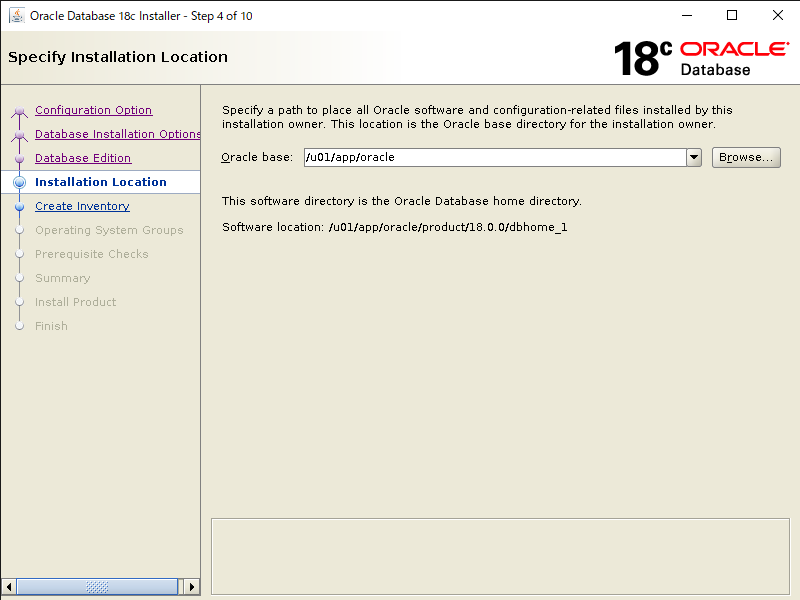
Oracle Databaseをインストールするパスを指定します。
Oracle base は先程作成したディレクトリ[/u01/app/oracle]がデフォルトで入るので、そのまま次へ。
Inventory Directory は先程作成したディレクトリ[/u01/app/oraInventory]がデフォルトで入るのでそのまま。
oraInventory Group Name は先程作成したグループ[oinstall]がデフォルトで入るのでそのまま次へ。

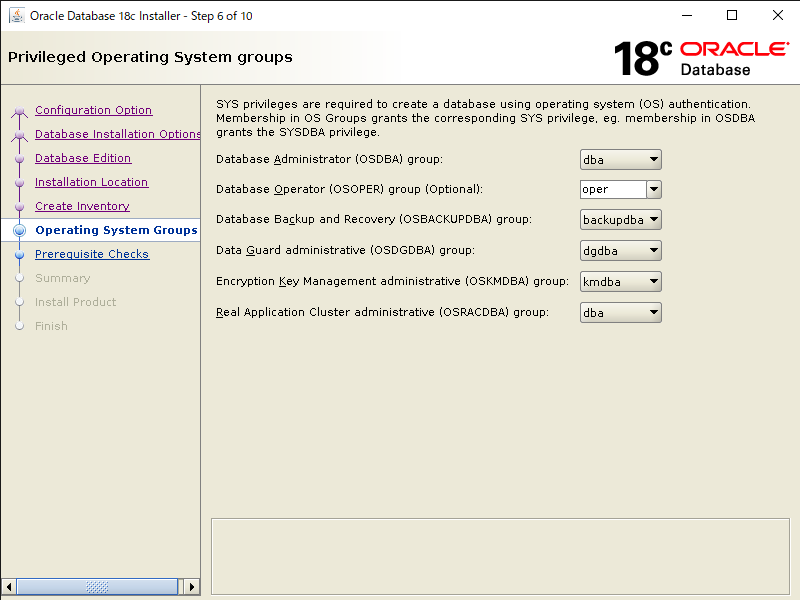
OS権限グループを指定します。先程作成したグループがデフォルトで以下の様にセットされますので、このまま次へ。
- OSDBA: dba
- OSOPER: oper
- OSBACKUPDBA: backupdba
- OSDGDBA: dgdba
- OSKMDBA: kmdba
- OSRACDBA: dba
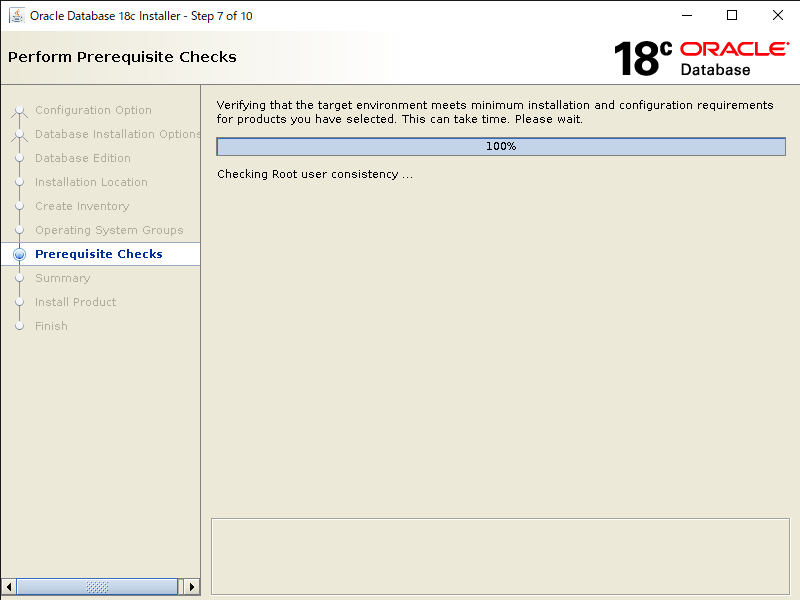
インストール前の前提チェックが始まります。
何もなければ自動的に次の画面へ進みますが、前提チェックに不備があるとチェックにひっかかった箇所が表示されるので、修正して再度チェックします。
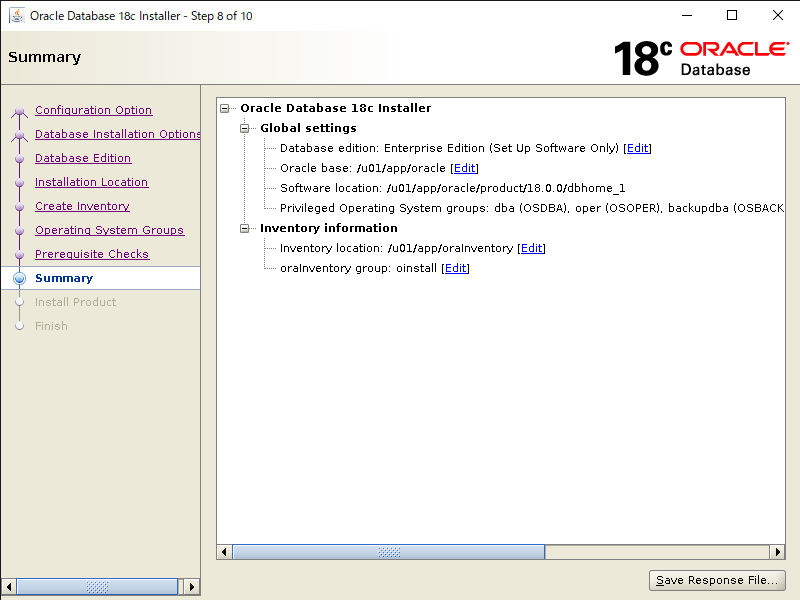
インストールの最終的な設定確認画面が表示されます。内容を確認して問題なければ「Install」をクリックします。
インストールの進捗画面に遷移します。
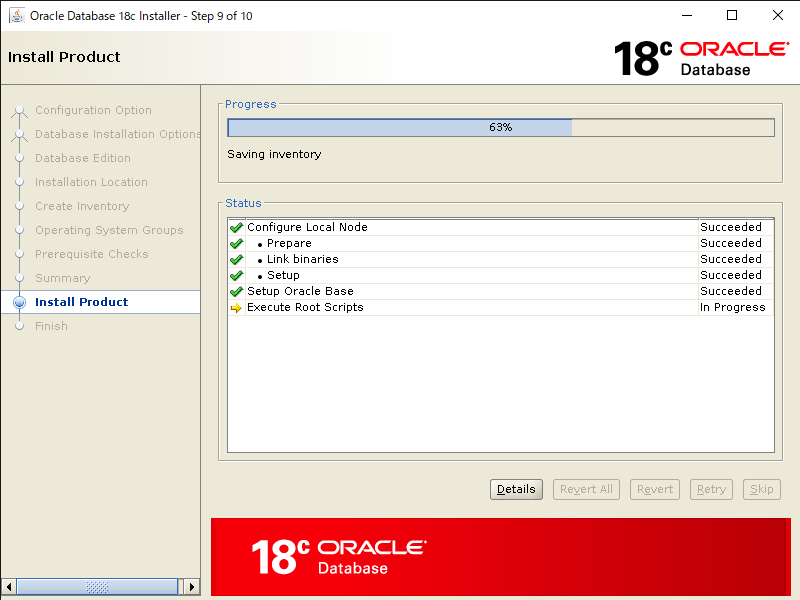
途中、別窓でroot.shの実行画面が表示されます。
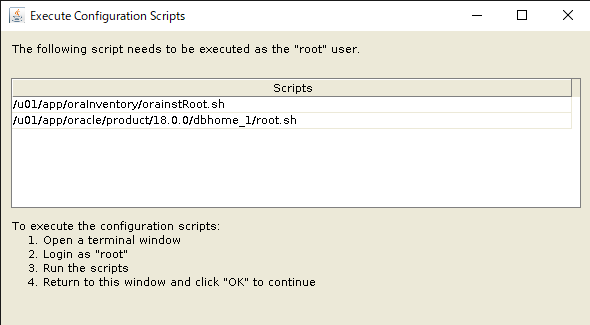
新規ターミナルを開き、rootユーザでログインして画面に表示されているコマンドを実行します。
[root@oel77 ~]# /u01/app/oraInventory/orainstRoot.sh
Changing permissions of /u01/app/oraInventory.
Adding read,write permissions for group.
Removing read,write,execute permissions for world.

Changing groupname of /u01/app/oraInventory to oinstall.
The execution of the script is complete.
[root@oel77 ~]# /u01/app/oracle/product/18.0.0/dbhome_1/root.sh
Performing root user operation.

The following environment variables are set as:
    ORACLE_OWNER= oracle
    ORACLE_HOME=  /u01/app/oracle/product/18.0.0/dbhome_1

Enter the full pathname of the local bin directory: [/usr/local/bin]: ★Enter押下
   Copying dbhome to /usr/local/bin ...
   Copying oraenv to /usr/local/bin ...
   Copying coraenv to /usr/local/bin ...


Creating /etc/oratab file...
Entries will be added to the /etc/oratab file as needed by
Database Configuration Assistant when a database is created
Finished running generic part of root script.
Now product-specific root actions will be performed.
Do you want to setup Oracle Trace File Analyzer (TFA) now ? yes|[no] : ★Enter押下

Oracle Trace File Analyzer (TFA - Non Daemon Mode) is available at :
    /u01/app/oracle/product/18.0.0/dbhome_1/suptools/tfa/release/tfa_home/bin/tfactl

Note :
1. tfactl will use TFA Daemon Mode if TFA already running in Daemon Mode and user has access to TFA
2. tfactl will configure TFA Non Daemon Mode only if user has no access to TFA Daemon mode or TFA Daemon mode is not installed

OR

Oracle Trace File Analyzer (TFA - Daemon Mode) can be installed by running this script :
    /u01/app/oracle/product/18.0.0/dbhome_1/suptools/tfa/release/tfa_home/install/roottfa.sh
完了したらroot.shの実行画面に戻り「OK」を押します。
再度インストール画面に戻るとインストールが完了するので[Close]をクリックして終了します。

oracleユーザのプロファイルにDB用の設定を追加
以下赤文字の部分をoracleユーザの .bash_profile に追記します。
[oracle@oel77 ~]$ vi /home/oracle/.bash_profile
# .bash_profile

# Get the aliases and functions
if [ -f ~/.bashrc ]; then
        . ~/.bashrc
fi

# User specific environment and startup programs

PATH=$PATH:$HOME/.local/bin:$HOME/bin

export PATH
umask 022
export ORACLE_BASE=/u01/app/oracle
export ORACLE_HOME=$ORACLE_BASE/product/18.0.0/dbhome_1
export PATH=/usr/sbin:$PATH
export PATH=$ORACLE_HOME/bin:$PATH
export LD_LIBRARY_PATH=$ORACLE_HOME/lib:/lib:/usr/lib
export CLASSPATH=$ORACLE_HOME/jlib:$ORACLE_HOME/rdbms/jlib
追加が完了したら、プロファイルを読み込みます。
[oracle@oel77 ~]$ source /home/oracle/.bash_profile
OEMリポジトリDBの作成
リポジトリDBテンプレートファイルを配置
冒頭でダウンロードしたDatabaseテンプレートファイル(18c用)を以下のディレクトリに配置します。
[oracle@oel77 ~]$ cd /u01/app/oracle/product/18.0.0/dbhome_1/assistants/dbca/templates
[oracle@oel77 templates]$ ls -l 18.1.0.0.0_Database_Template_for_EM13_3_0_0_0_Linux_x64.zip
-rw-r--r-- 1 oracle oinstall 371403798 Dec  4 15:45 18.1.0.0.0_Database_Template_for_EM13_3_0_0_0_Linux_x64.zip
リポジトリDBテンプレートファイルを解凍
配置したDBテンプレートをtemplatesディレクトリに解凍します。
[oracle@oel77 ~]$ cd /u01/app/oracle/product/18.0.0/dbhome_1/assistants/dbca/templates
[oracle@oel77 templates]$ unzip 18.1.0.0.0_Database_Template_for_EM13_3_0_0_0_Linux_x64.zip
Archive:  18.1.0.0.0_Database_Template_for_EM13_3_0_0_0_Linux_x64.zip
  inflating: set_repo_param_18_1_0_0_0_Database_SQL_for_EM13_3_0_0_0_Large_deployment.sql
  inflating: set_repo_param_18_1_0_0_0_Database_SQL_for_EM13_3_0_0_0_Medium_deployment.sql
  inflating: set_repo_param_18_1_0_0_0_Database_SQL_for_EM13_3_0_0_0_Small_deployment.sql
  inflating: shpool_18_1_0_0_0_Database_SQL_for_EM13_3_0_0_0.sql
  inflating: 18_1_0_0_0_Database_Template_for_EM13_3_0_0_0_Large_deployment.dbc
  inflating: 18_1_0_0_0_Database_Template_for_EM13_3_0_0_0_Medium_deployment.dbc
  inflating: 18_1_0_0_0_Database_Template_for_EM13_3_0_0_0_Small_deployment.dbc
  inflating: 18_1_0_0_0_Database_Template_for_EM13_3_0_0_0.dfb
  inflating: 18_1_0_0_0_Database_Template_for_EM13_3_0_0_0.ctl
DBCA(Database Configuration Assistant)を起動
データベース作成用のGUIであるDBCAを起動します。
[oracle@oel77 ~]$ cd /u01/app/oracle/product/18.0.0/dbhome_1/bin
[oracle@oel77 bin]$ ./dbca
リポジトリDBをテンプレートから作成
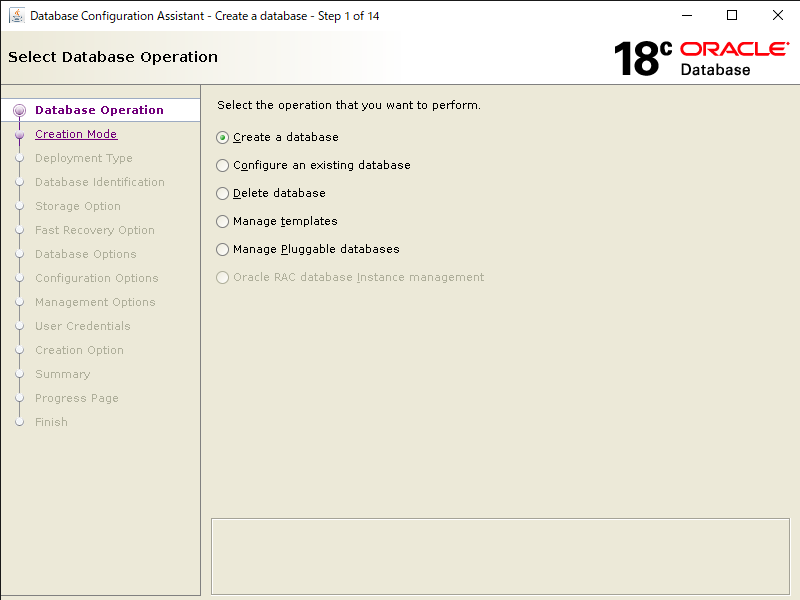
DBCAが起動したら、[Create a database]を選択。
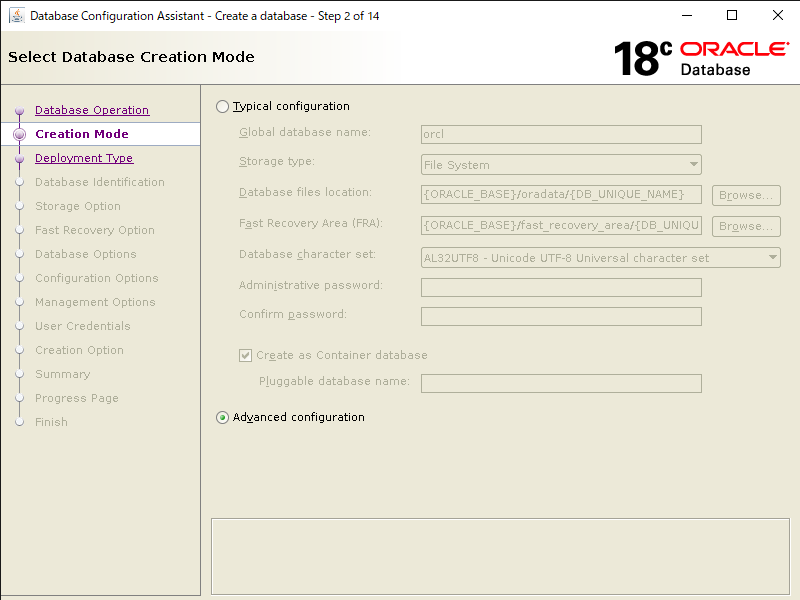
Select Database Creation Mode は[Advanced configuration]を選択。
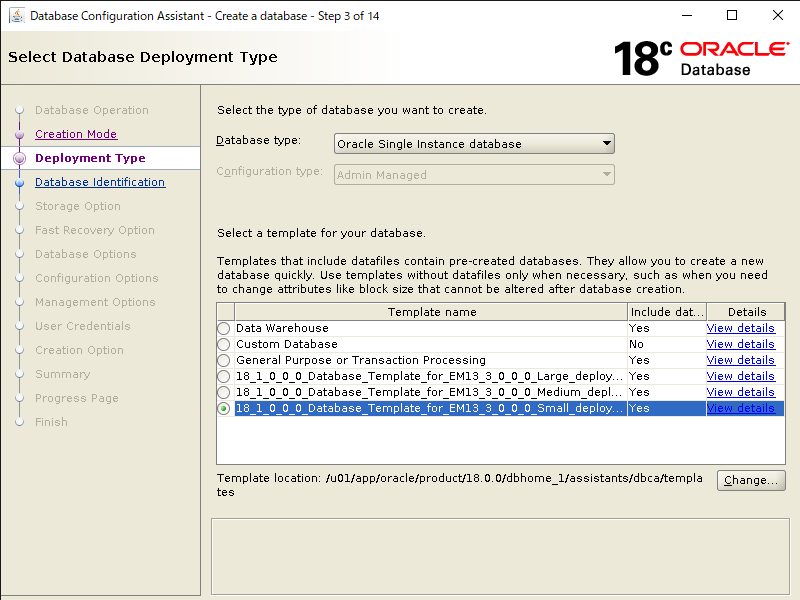
今回はシンプルにDatabase Type は[Oracle Single Instance Database]を選択。
配置・解凍したTemplateの中から[18_1_0_0_0_Database_Template_for_EM13_3_0_0_0_Small_deployment]を選択。
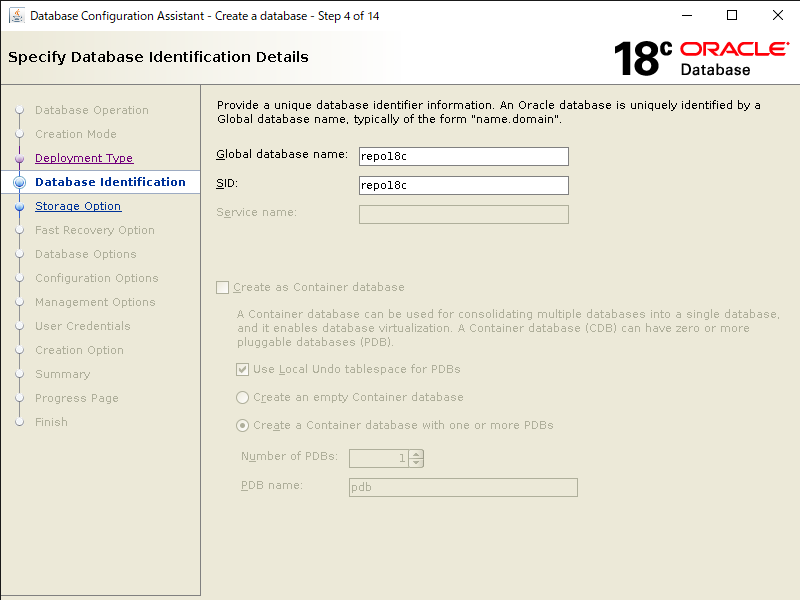
データベースとインスタンスの名前を決めます。今回は以下を入力します。
- Global Database Name: repo18c
- SID: repo18c
Select Database Storage Option はテンプレートの内容をそのまま使用するので、[Use template file for database storage attributes]を選択。
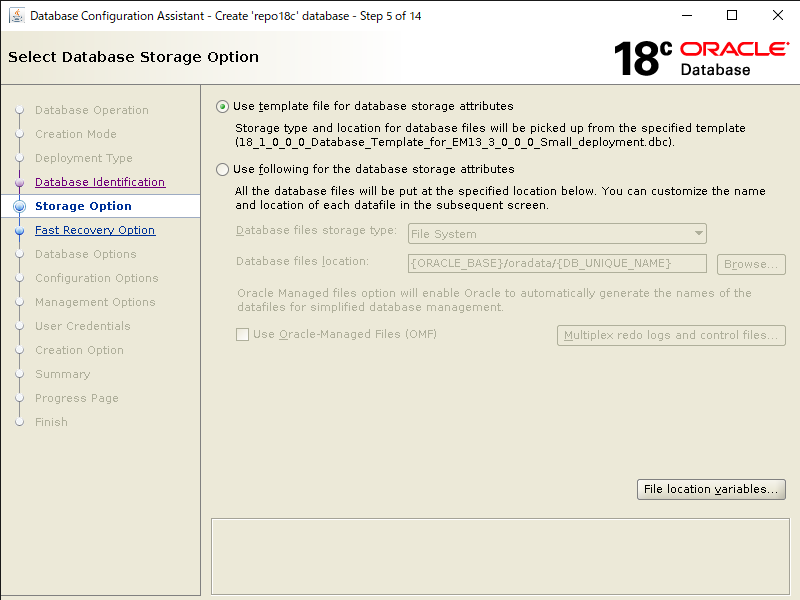
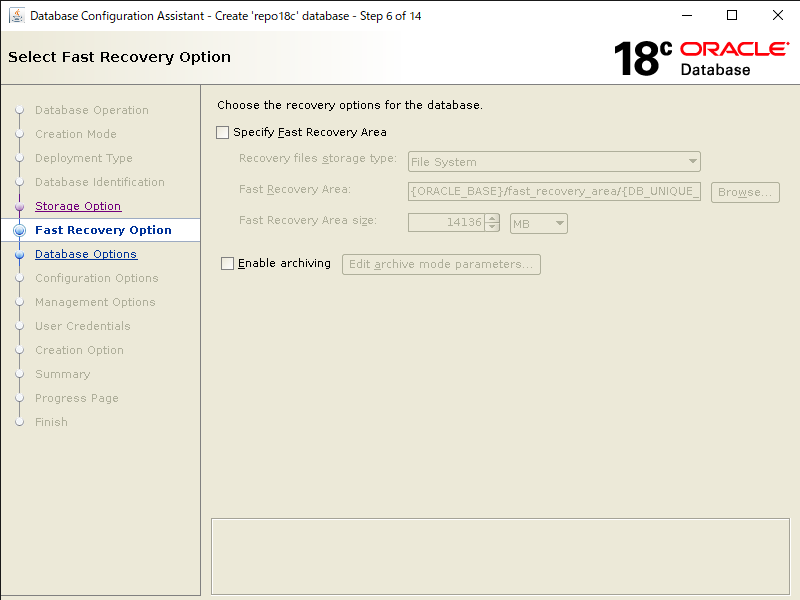
高速リカバリ領域は作成しないので、チェックはせずに次へ。
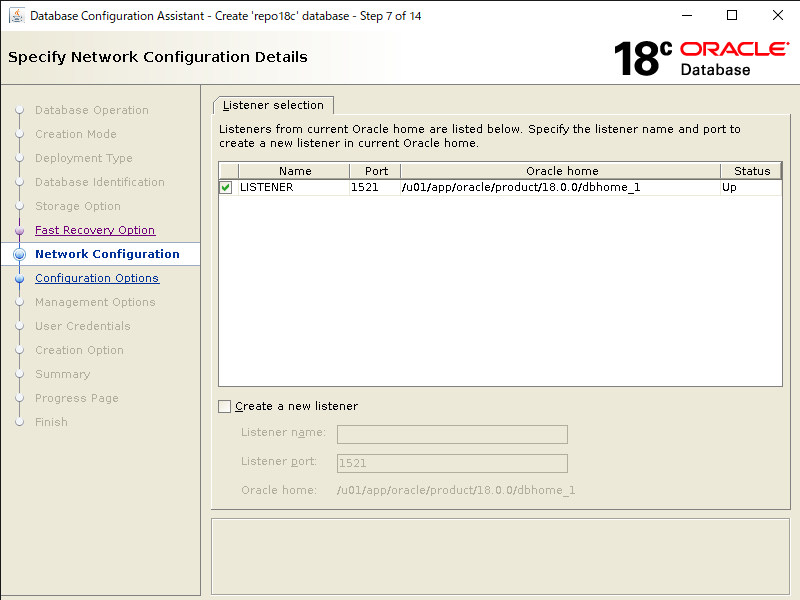
リスナーを作成します。
[Create a new listener]にチェックを付け、以下でリスナーを作成します。
- Listener name: LISTENER
- Listener port: 1521
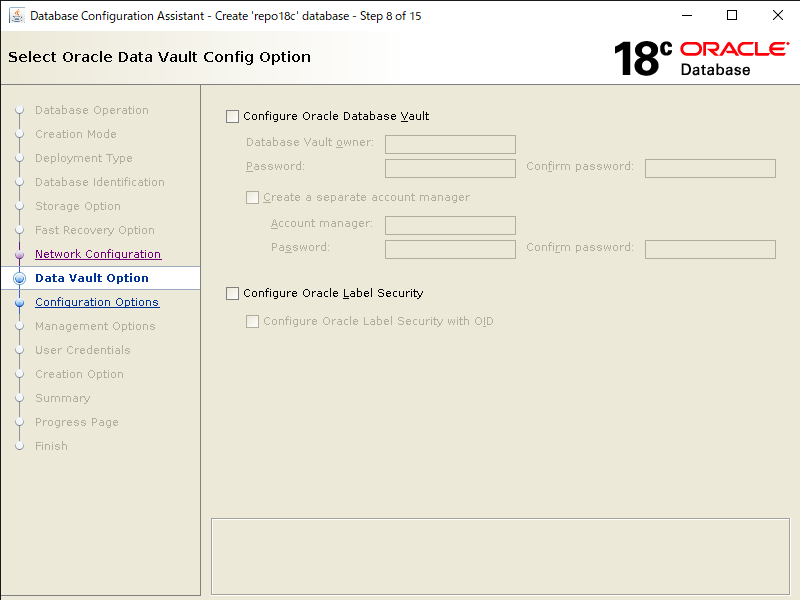
今回Oracle Data Vaultは使用しないので、何もチェックせず次へ。
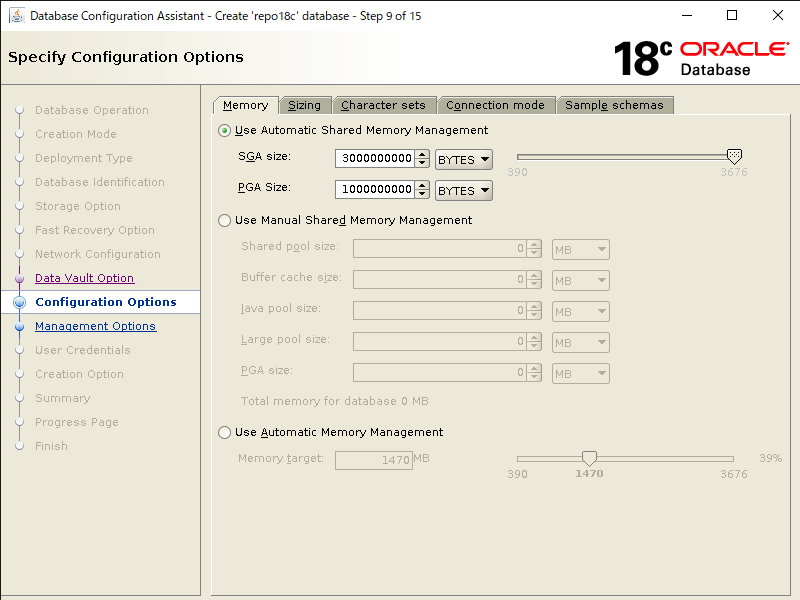
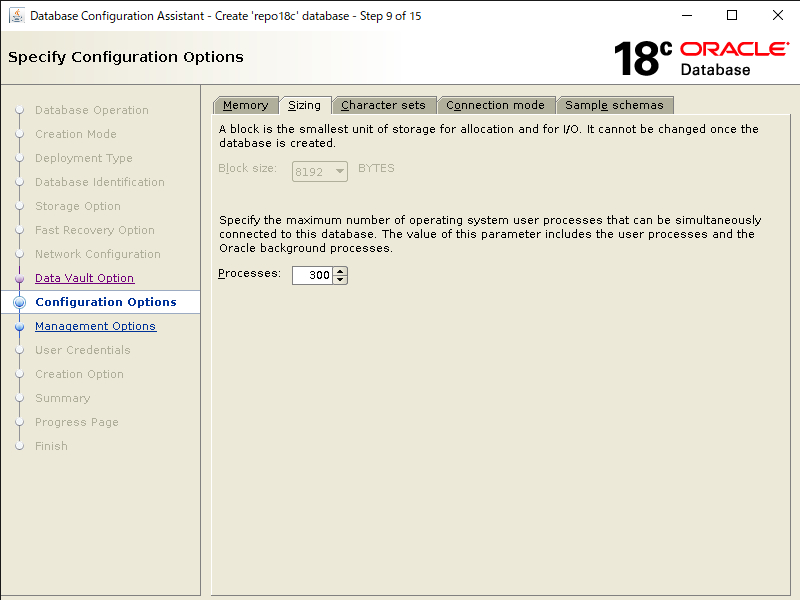
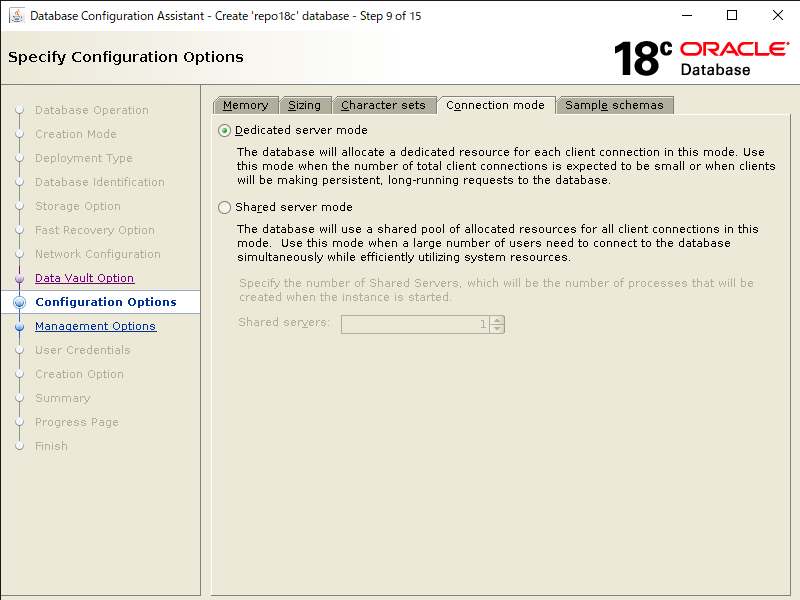
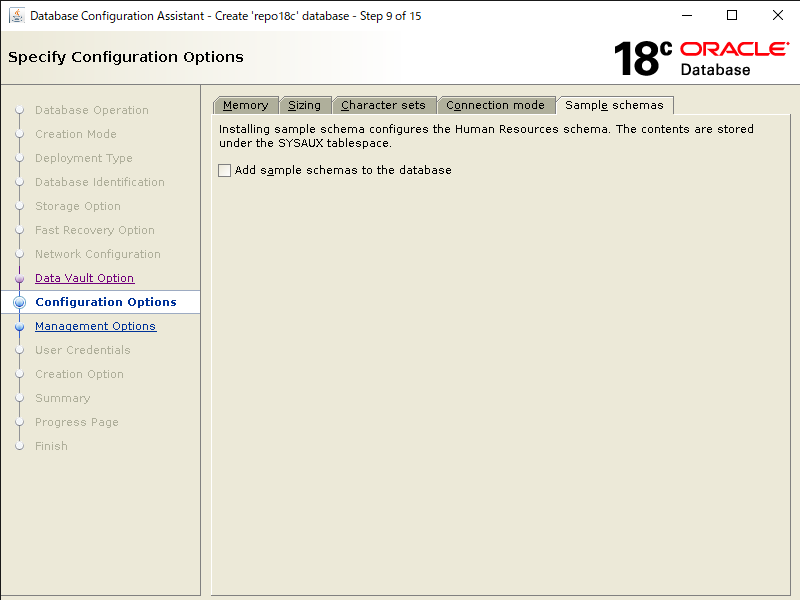
DBの各設定を行います。今回は全てデフォルト設定を使用します。
[Memory]タブ
[Sizing]タブ
[Character sets]タブ

[Connection mode]タブ
[Sample schemas]タブ
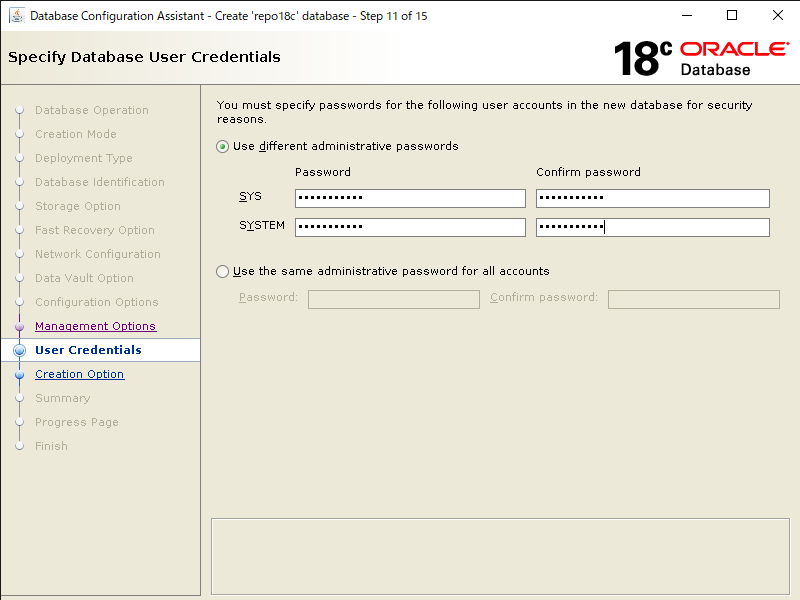
DB管理ユーザ[SYS,SYSTEM]のパスワードを入力し次へ。
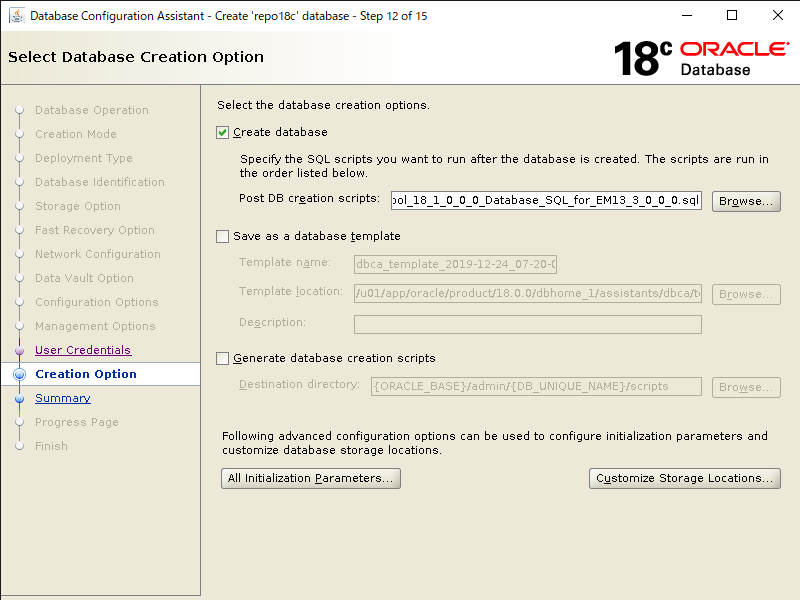
[Create Database]にチェックを付けて、解凍したDBテンプレートを以下フルパスで指定して次へ。
/u01/app/oracle/product/18.0.0/dbhome_1/assistants/dbca/templates/shpool_18_1_0_0_0_Database_SQL_for_EM13_3_0_0_0.sql
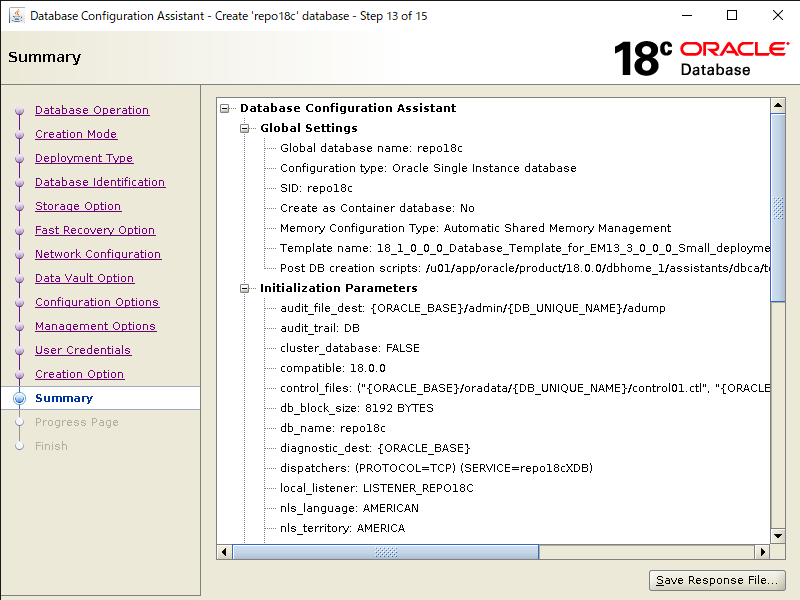
サマリが表示されるので、問題なければ[Finish]をクリックします。
リポジトリDBの作成が始まります。
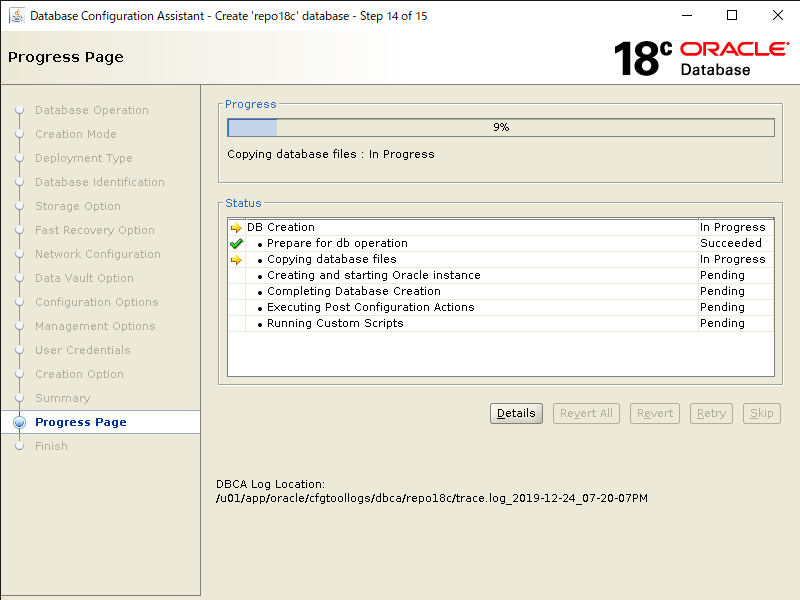
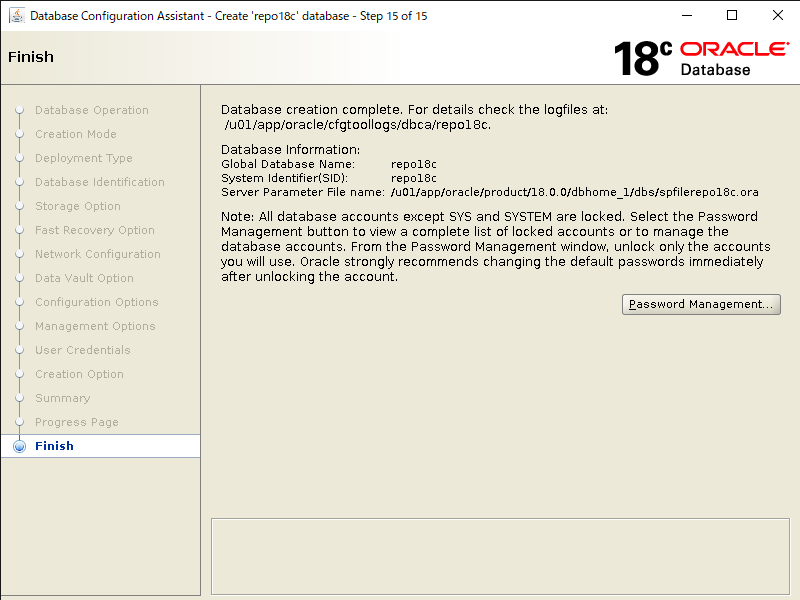
リポジトリDBの作成完了画面が表示されたら[Close]をクリックして終了です。
OEM13cインストール
最後にOEM13c本体をインストールします。
必要パッケージのインストール
[root@oel77 ~]# yum install -y libXrender
OEMインストールOSユーザの作成
OEMインストールユーザ兼OEM管理ユーザを作成します。今回はoemという名前でOSユーザを作成します。
[root@oel77 ~]# useradd -u 54322 -g oinstall oem
OEMインストールユーザのパスワード設定
[root@oel77 ~]# passwd oem
Changing password for user oem.
New password: ←設定するパスワードを入力
Retype new password: ←再度設定するパスワードを入力
passwd: all authentication tokens updated successfully.
OEMインストールディレクトリの作成
[root@oel77 ~]# su - oem
[oem@oel77 ~]$ mkdir -p /u01/app/oracle/emcc/middleware
[oem@oel77 ~]$ mkdir -p /u01/app/oracle/emcc/agent13c
OEMインストールユーザのプロファイル設定
OEMインストールユーザの .bash_profile に以下赤字の設定を追記します。
[oem@oel77 ~]$ vi /home/oem/.bash_profile
# .bash_profile

# Get the aliases and functions
if [ -f ~/.bashrc ]; then
        . ~/.bashrc
fi

# User specific environment and startup programs

PATH=$PATH:$HOME/.local/bin:$HOME/bin

export PATH
export ORACLE_BASE=/u01/app/oracle
export ORACLE_HOME=/u01/app/oracle/emcc/middleware
export MW_HOME=/u01/app/oracle/emcc/middleware
export WL_HOME=/u01/app/oracle/emcc/middleware/wlserver
export LANG=C
export NLS_LANG=American_America.AL32UTF8
export PATH=$ORACLE_HOME/bin:$MW_HOME/bin:$PATH
OEM13cインストールバイナリの配置
冒頭でダウンロードしたOEM13cのインストールバイナリを配置します。
インストール後は不要になるファイルなので、今回は/tmpに配置します。
[oem@oel77 ~]$ cd /tmp
[oem@oel77 tmp]$ ls -l
-rw-r--r--  1 oem  oinstall 1742204641 Apr 16  2019 em13300_linux64-2.zip
-rw-r--r--  1 oem  oinstall 2090882426 Apr 16  2019 em13300_linux64-3.zip
-rw-r--r--  1 oem  oinstall 2117436260 Apr 16  2019 em13300_linux64-4.zip
-rw-r--r--  1 oem  oinstall  694002559 Apr 16  2019 em13300_linux64-5.zip
-rw-r--r--  1 oem  oinstall 1801995711 Apr 16  2019 em13300_linux64-6.zip
-rw-r--r--  1 oem  oinstall 1278491093 Apr 16  2019 em13300_linux64.bin
OEM13cインストールバイナリに実行権限を付与
インストーラー起動用のファイルに実行権限を付与します。
[oem@oel77 tmp]$ chmod +x em13300_linux64.bin
OEM13cインストーラーの起動
oemユーザで新規ログインして、インストーラーを起動します。
zipファイルを解凍しながら起動が始まるので、少し時間がかかります。
[oem@oel77 ~]$ cd /tmp
[oem@oel77 tmp]$ ./em13300_linux64.bin
0%........
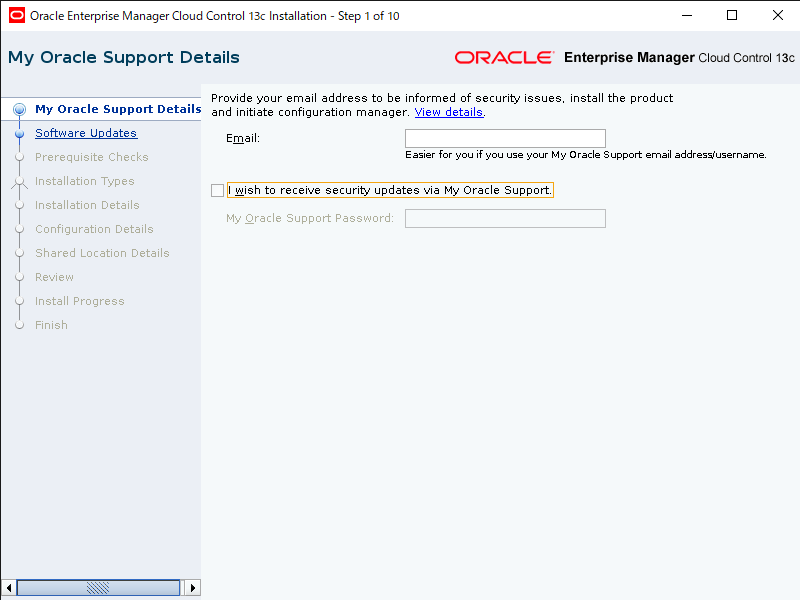
GUIインストーラーが起動します。
My Oracle SupportのからのUpdate情報を受け取るかを聞かれます。
今回は受け取らないので[I wish to receive security updates via Oracle Support.] のチェックを外して次へ。
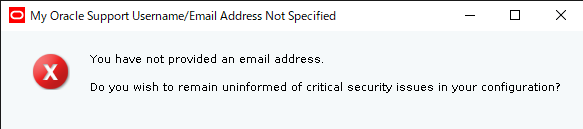
警告が出ますが[yes]をクリックして次へ進みます。
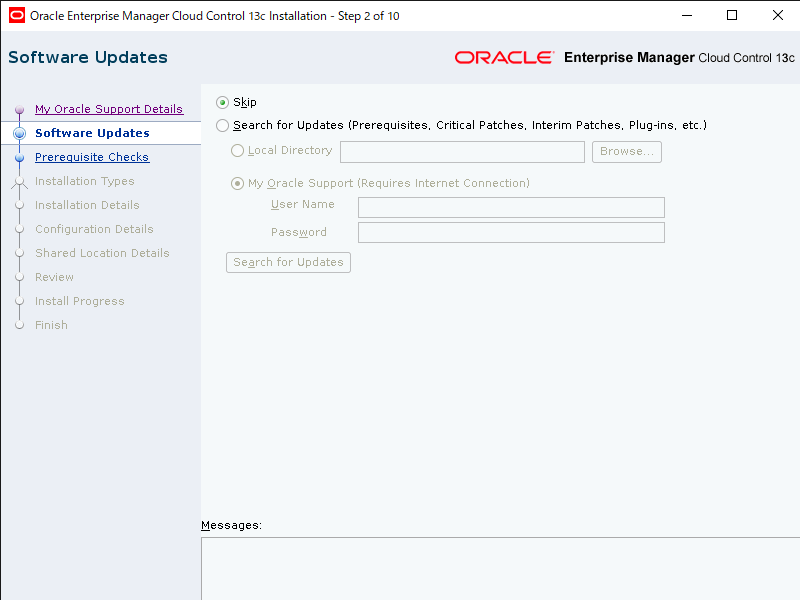
ソフトウェアアップデートの選択になります。
今回はアップデートしないので[Skip]を選択し次へ。
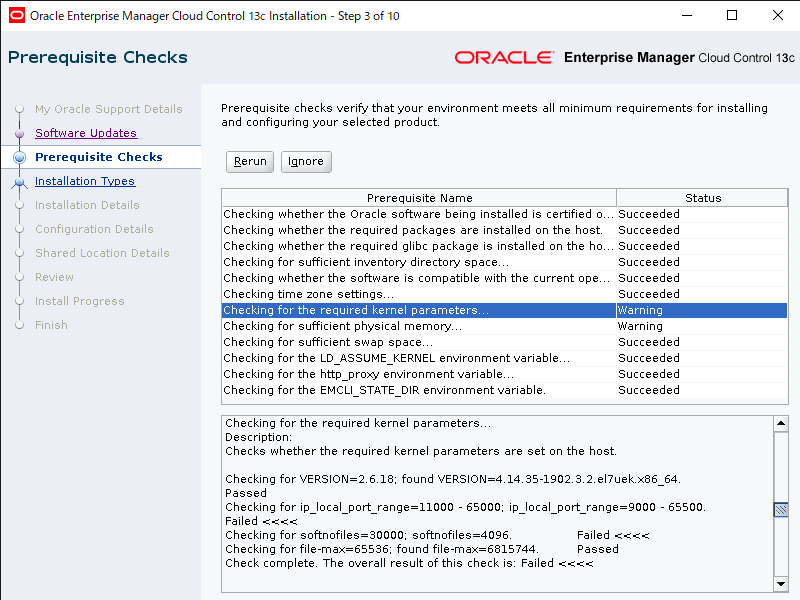
前提チェックが行われます。Scceededではない箇所については変更して[Return]をクリックして再度前提チェックを行います。
全てScceededになったら[Next >]をクリックします。
※今回はip_local_port_rangeのfaildが出ていたので、以下を修正しました。
[root@oel77 ~]# vi /etc/sysctl.d/97-oracle-database-sysctl.conf
net.ipv4.ip_local_port_range = 11000 65000
カーネルパラメータ設定を反映させます。
[root@oel77 ~]# sysctl --system
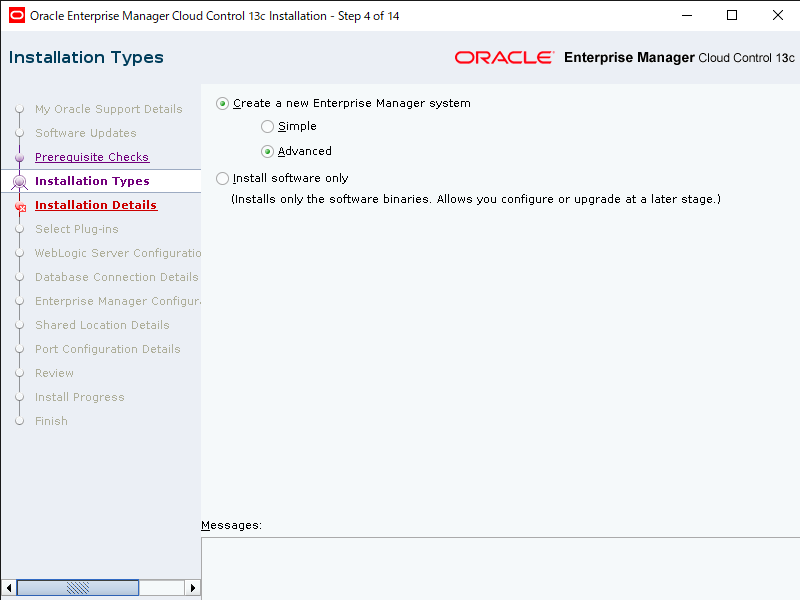
インストールタイプを選択します。今回は[Create a new Enterprise Manager system]の[Advanced]を選択して次へ。
インストールするディレクトリ設定をします。今回は以下にインストールします。
- Middleware Home Location: /u01/app/oracle/emcc/middleware
- Agent Base directory: /u01/app/oracle/emcc/agent13c
- Host Name: oel77
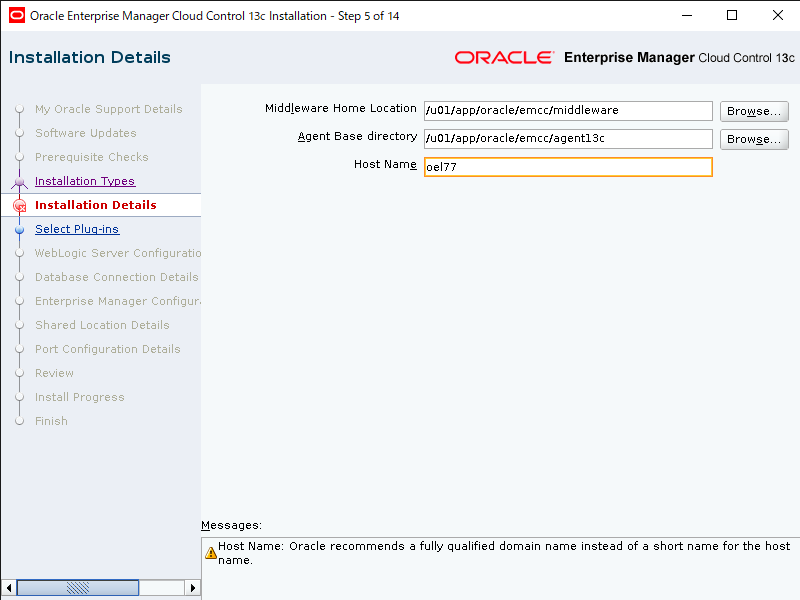
ドメインまで含めたホスト名をおすすめする警告が出て来ますが[OK]をクリックします。

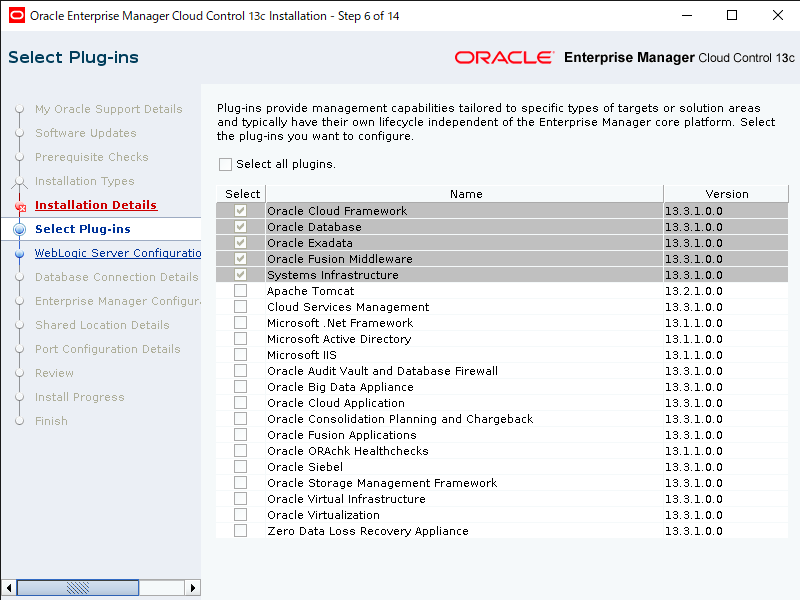
プラグインの選択ですが、今回はデフォルトのままインストールします。
Weblogic Server のユーザーパスワード設定をします。
[OMS Instance Base Location]はデフォルトの[/u01/app/oracle/emcc/gc_inst]のまま次へ。
※画面キャプチャするの忘れました(汗)
リポジトリDBの情報を入力します。先程作成した18cデータベースの情報を入力します。
- Dababase Host Name: (oel77)
- Port: 1521
- Service/SID: repo18c
- SYS Password: 先程作成したSYSのパスワード
Deployment Size は今回[SMALL]を選択して次へ。

※リスナーが起動していない場合はlsnrctlコマンドで起動します。
[oracle@oel77 ~]$ lsnrctl start

Copyright (c) 1991, 2018, Oracle.  All rights reserved.

Starting /u01/app/oracle/product/18.0.0/dbhome_1/bin/tnslsnr: please wait...

TNSLSNR for Linux: Version 18.0.0.0.0 - Production
System parameter file is /u01/app/oracle/product/18.0.0/dbhome_1/network/admin/listener.ora
Log messages written to /u01/app/oracle/diag/tnslsnr/oel77/listener/alert/log.xml
Listening on: (DESCRIPTION=(ADDRESS=(PROTOCOL=tcp)(HOST=oel77)(PORT=1521)))
Listening on: (DESCRIPTION=(ADDRESS=(PROTOCOL=ipc)(KEY=EXTPROC1521)))

Connecting to (DESCRIPTION=(ADDRESS=(PROTOCOL=TCP)(HOST=oel77)(PORT=1521)))
STATUS of the LISTENER
------------------------
Alias                     LISTENER
Version                   TNSLSNR for Linux: Version 18.0.0.0.0 - Production
Uptime                    0 days 0 hr. 0 min. 10 sec
Trace Level               off
Security                  ON: Local OS Authentication
SNMP                      OFF
Listener Parameter File   /u01/app/oracle/product/18.0.0/dbhome_1/network/admin/listener.ora
Listener Log File         /u01/app/oracle/diag/tnslsnr/oel77/listener/alert/log.xml
Listening Endpoints Summary...
  (DESCRIPTION=(ADDRESS=(PROTOCOL=tcp)(HOST=oel77)(PORT=1521)))
  (DESCRIPTION=(ADDRESS=(PROTOCOL=ipc)(KEY=EXTPROC1521)))
The listener supports no services
The command completed successfully
※データベースが起動していない場合はstartupコマンドで起動します。
[oracle@oel77 ~]$ export ORACLE_SID=repo18c
[oracle@oel77 ~]$ sqlplus / as sysdba
SQL> startup

SQL*Plus: Release 18.0.0.0.0 - Production on Fri Dec 27 15:00:17 2019
Version 18.3.0.0.0

Connected to an idle instance.

SQL> startup
ORACLE instance started.

Total System Global Area 3003120840 bytes
Fixed Size                  8662216 bytes
Variable Size             771751936 bytes
Database Buffers         2214592512 bytes
Redo Buffers                8114176 bytes
Database mounted.
Database opened.
SQL> exit
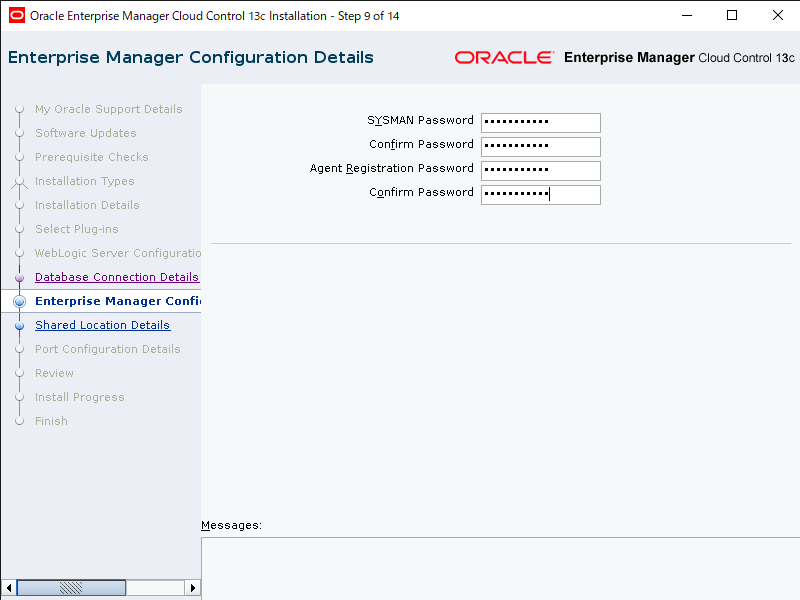
OEMユーザ(SYSMAN, Agent Registration)のパスワード設定を行い次へ。
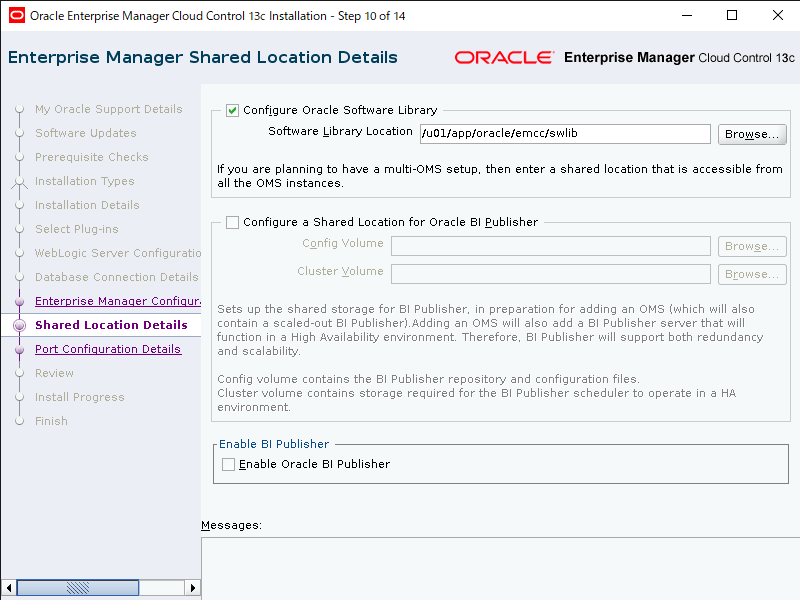
共有領域を設定します。Oracle BI Publisherは使用しないので、以下の設定で次へ。
Configure Oracle Software Library にチェックされていることを確認し、Software Library Locationはデフォルトの[/u01/app/oracle/emcc/swlib]を設定。
Configure a shared Location for Oracle BI Publisher がチェックされていないことを確認。
Enable Oracle BI Publisher はチェックを外します。
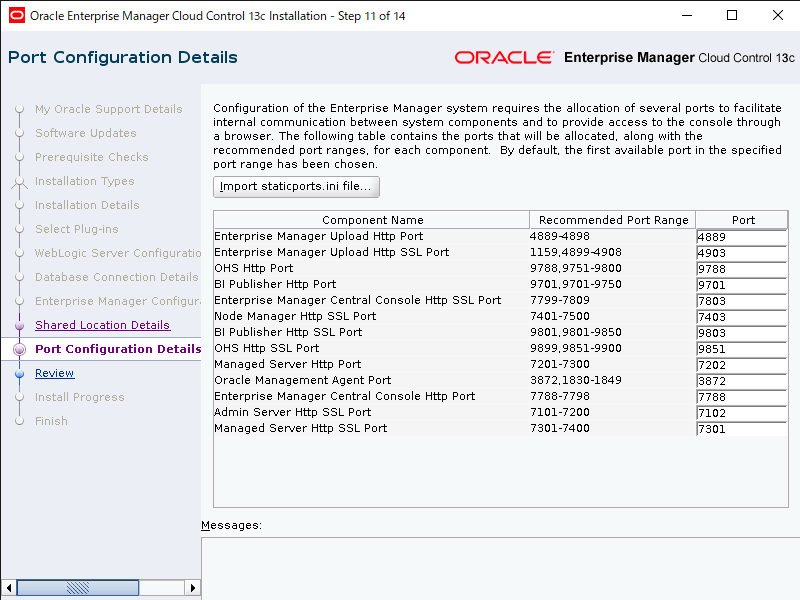
それぞれのプロセスポート設定はデフォルトのまま次へ。
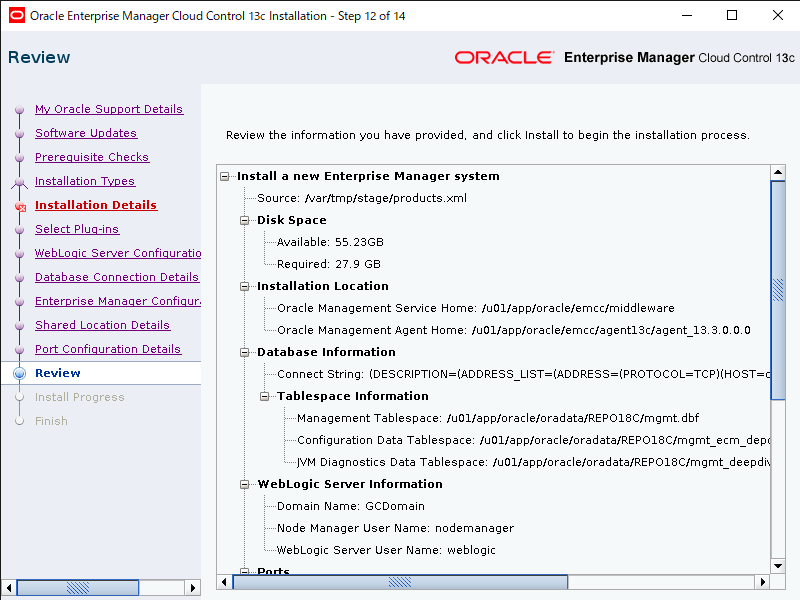
最終的なインストール構成レビュー画面で問題なければ[Install]をクリックします。
インストールの進捗画面になるので、しばらく待ちます。
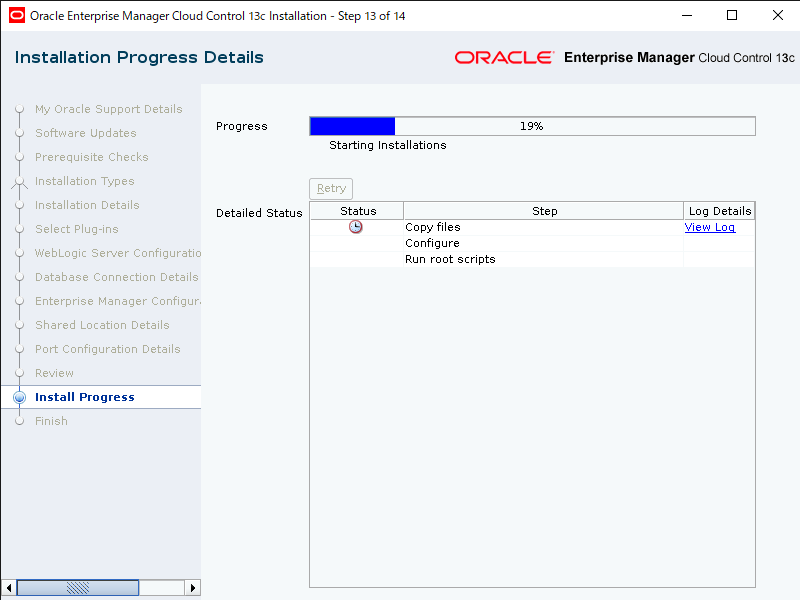
途中allroot.shの実行画面が表示されたら、rootユーザで表示通りのコマンドを実行します。
[root@oel77 ~]# /u01/app/oracle/emcc/middleware/allroot.sh
allroot.sh を実行した後、GUIに戻って[OK]を押下すればインストール完了です。
OEMへの接続テスト
ブラウザから以下のアドレスでOEMにアクセスします。
https://<サーバIP>:7803/em
以下の画面が表示されればインストール完了です。
SYSMANユーザでログインしてください。
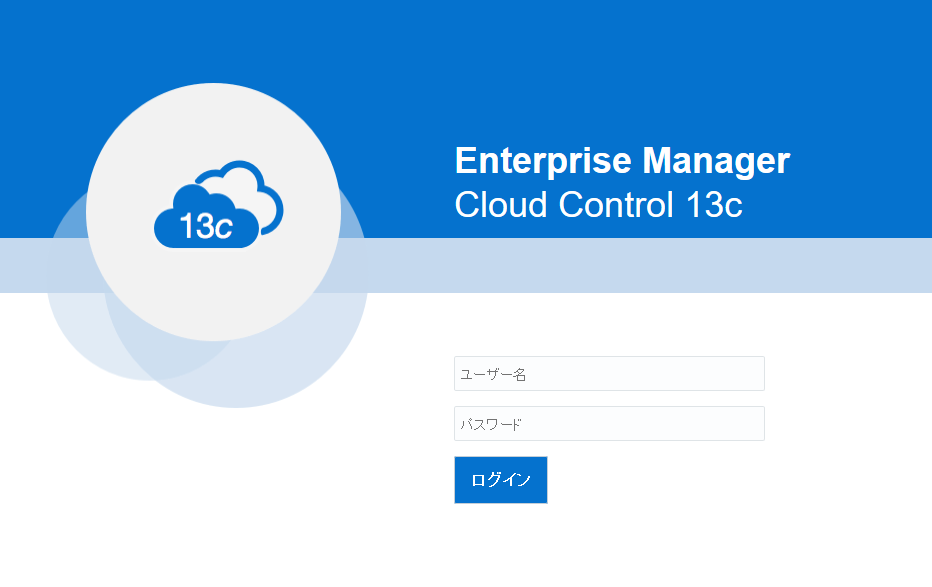
以上で Oracle Enterprise Manager 13c のインストールは完了です。